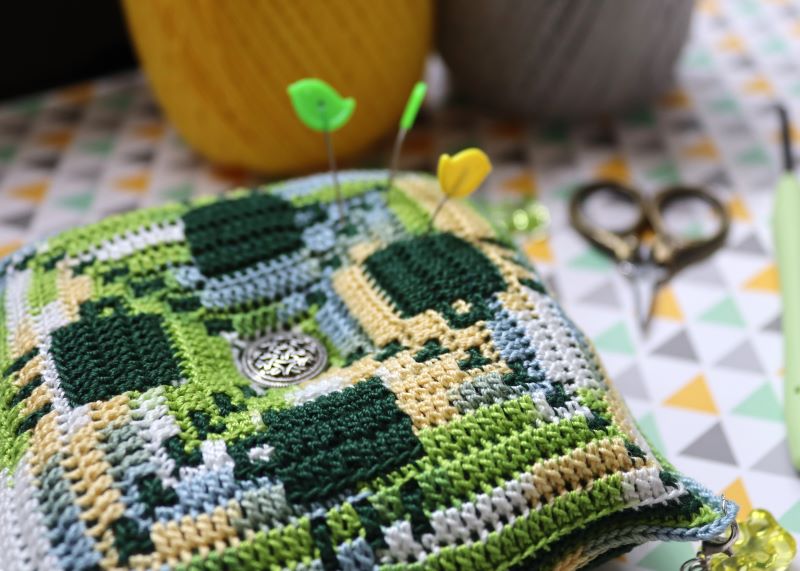
A crochet pin cushion is a delightful and practical accessory for any sewing or crafting enthusiast. Meticulously handcrafted with intricate crochet patterns, these pin cushions are not only functional but also add a touch of charm and elegance to your workspace. Whether fashioned in the shape of a traditional square, a whimsical animal, or a blooming flower, each pin cushion is designed to securely hold your pins and needles, keeping them organized and easily accessible. Beyond their utility, crochet pin cushions are often admired for their artistry and the skill involved in their creation, making them a beloved staple in the world of handmade crafts.
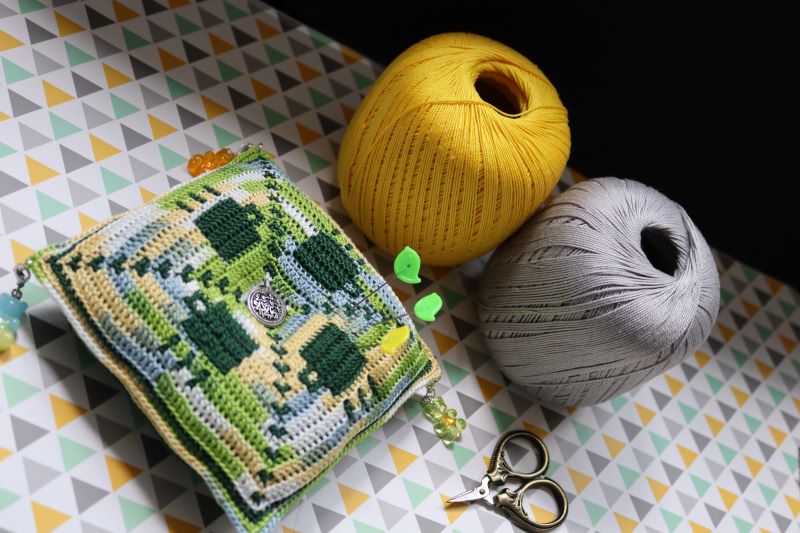
Tools and Materials you will need to make Crochet Pin Cushion
- 1 ball of Hobbi “Rainbow” (colour 16), 50g = 280m, 100% Mercerised Cotton = Colour A
- 1 ball of Rico “Essentials Crochet” (colour 13), 50g = 280m, 100% Mercerised Cotton = Colour B
- Fiberfil 10 – 15 gr
- Small button of choice if you want one
- Crochet hook 1.75mm (4/0)
- Embroidery needle
- Scissors
Measurements of the pin cushion
- Finished pin cushion will be approx. 11 cm x 11cm / 4 inches from side to side
Tips
- This crochet pin cushion pattern is worked in rounds. You will work on the Right Side of the pattern only.
- This pattern is made using mosaic crochet techniques. For this pattern you will work all SC’s in the back loop of the ST – except the corners ST you will make in the Ch.
- When connecting a round – cut the yarn and use invisible join. Hide yarn tails on the back of the work.
- The chart shows only one side of the pattern. You can easily read it by starting in the middle point, working on the Left Side first and then continue the Right Side of the same row.
- In mosaic crochet, you make DC’s in the FRONT LOOP of the stitch two rounds down. If you make DC in Round 3, you will use the FRONT LOOP of the ST under it in Round 1. You will always skip a ST on a working round with DC’s.
- In this pattern, you always make the first ST of the round in the attachment ST.
Abbreviations (US Terms)
- Ch – Chain
- MR – Magic Ring
- SP – Space
- ST – Stitch
- BLSC – Back loop single crochet
- HDC – Half Double Crochet
- FLDC – Front loop double crochet. 2 Rows (Rs) below
Crochet Pin Cushion Pattern
Starting Off
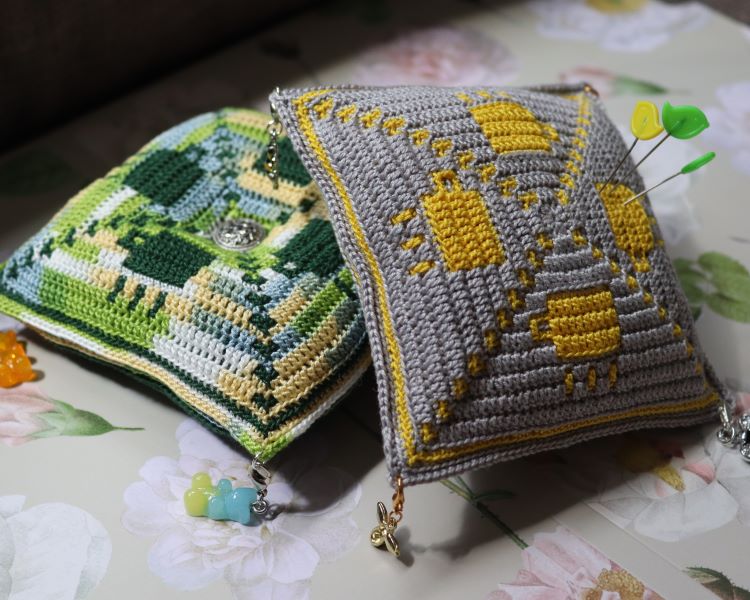
- Make 2 similar sqaures.
- With Colour A and crochet hook 1.75mm (4/O) make a Magic Ring.
Round 1
- Ch1 (doesn’t count as a ST).
- (2 SC in MR, Ch2, 1 SC in MR) 4 times.
- Cut the yarn leaving a tail long enough to hide it.
- Close with invisible join.
- [ 4 sides of 3 SC and 4 sides of Ch2 corners ]
Round 2
- Start with Colour B.
- Start with standing BLSC in the same stitch where you have closed R1. BLSC in next ST, SC in 1st Ch of Ch2 SP, Ch2, SC into 2nd Ch of Ch2 SP, BLSC in next ST.
- (BLSC in next 2 ST, SC in 1st Ch of Ch2 SP, Ch2, SC into 2nd Ch of Ch2 SP, BLSC in next ST) – repeat on all sides.
- Invisible join into the top of the 1st BLSC to close this round.
- Cut the yarn, leaving a tail long enough to hide it.
- [4 sides of 3 BLSC/ 2 SC and 4 corners – Ch2]
Round 3
- Start with Colour A.
- Start with standing FLDC in the same stitch where you have closed R2, FLDC in next ST, BLSC, SC in 1st Ch of Ch2 SP, Ch2, SC into 2nd Ch of Ch2 SP, BLSC, FLDC.
- (FLDC in next 2 ST, BLSC, SC in 1st Ch of Ch2 SP, Ch2, SC into 2nd Ch of Ch2 SP, BLSC, FLDC) – repeat on all sides.
- Invisible join into the top of the 1st FLDC to close this round.
- Cut the yarn leaving a tail long enough to hide it.
- [4 sides of 3 FLDC/2 BLSC/2 SC and 4 corners – Ch2]
Round 4
- Start with Colour B.
- Start with standing BLSC in the same stitch where you have closed R3. BLSC in next 3 ST, SC in 1st Ch of Ch2 SP, Ch2, SC into 2nd Ch of Ch2 SP, BLSC in next 3 ST.
- (BLSC in next 4 ST, SC in 1st Ch of Ch2 SP, Ch2, SC into 2nd Ch of Ch2 SP, BLSC in next 3 ST) – repeat on all sides.
- Invisible join into the top of the 1st BLSC to close this round.
- Cut the yarn, leaving a tail long enough to hide it.
- [4 sides of 7 BLSC/2 SC and 4 corners – Ch2]
Round 5
- Start with Colour A.
- Start with standing FLDC in the same stitch where you have closed R4, FLDC in next 3 ST, BLSC, SC in 1st Ch of Ch2 SP, Ch2, SC into 2nd Ch of Ch2 SP, BLSC, FLDC in next 3 ST.
- (FLDC in next 4 ST, BLSC, SC in 1st Ch of Ch2 SP, Ch2, SC into 2nd Ch of Ch2 SP, BLSC, FLDC in next 3 ST) – repeat on all sides.
- Invisible join into the top of 1st FLDC to close this round.
- Cut the yarn, leaving a tail long enough to hide it.
- [4 sides of 7 FLDC/2 BLSC/ 2 SC and 4 corners – Ch2]
Round 6
- Start with Colour B.
- Start with standing BLSC in the same stitch where you have closed R5. BLSC in next 5 ST, SC in 1st Ch of Ch2 SP, Ch2, SC into 2nd Ch of Ch2 SP, BLSC in next 5 ST.
- (BLSC in next 6 ST, SC in 1st Ch of Ch2 SP, Ch2, SC into 2nd Ch of Ch2 SP, BLSC in next 5 ST) – repeat on all sides.
- Invisible join into the top of the 1st BLSC to close this round.
- Cut the yarn, leaving a tail long enough to hide it.
- [4 sides of 11 BLSC/2 SC and 4 corners – Ch2]
Round 7
- Start with Colour A.
- Start with standing FLDC in the same stitch where you have closed R6, FLDC in next 5 ST, BLSC, SC in 1st Ch of Ch2 SP, Ch2, SC into 2nd Ch of Ch2 SP, BLSC, FLDC in next 5 ST.
- (FLDC in next 6 ST, BLSC, SC in 1st Ch of Ch2 SP, Ch2, SC into 2nd Ch of Ch2 SP, BLSC, FLDC in next 5 ST) – repeat on all sides.
- Invisible join into the top of the 1st FLDC to close this round.
- Cut the yarn, leaving a tail long enough to hide it.
- [4 sides of 11 FLDC/2 BLSC/2 SC and 4 corners – Ch2]
Round 8
- Start with Colour B.
- Start with standing BLSC in the same stitch where you have closed R7. BLSC in next 7 ST, SC in 1st Ch of Ch2 SP, Ch2, SC into 2nd Ch of Ch2 SP, BLSC in next 7 ST.
- (BLSC in next 8 ST, SC in 1st Ch of Ch2 SP, Ch2, SC into 2nd Ch of Ch2 SP, BLSC in next 7 ST) – repeat on all sides.
- Invisible join into the top of the 1st BLSC to close this round.
- Cut the yarn, leaving a tail long enough to hide it.
- [4 sides of 15 BLSC/ 2 SC and 4 corners – Ch2]
Round 9
- Start with Colour A.
- Start with standing BLSC in the same stitch where you have closed R8, BLSC in next 4 ST, FLDC in next 3 ST, BLSC, SC in 1st Ch of Ch2 SP, Ch2, SC into 2nd Ch of Ch2 SP, BLSC, FLDC, in next 3 ST, BLSC in next 4 ST.
- (BLSC in next 5 ST, FLDC in next 3 ST, BLSC, SC in 1st Ch of Ch2 SP, Ch2, SC into 2nd Ch of Ch2 SP, BLSC, FLDC in next 3 ST, BLSC in next 4 ST) – repeat on all sides.
- Invisible join into the top of the 1st BLSC to close this round.
- Cut the yarn, leaving a tail long enough to hide it.
- [4 sides of 6 FLDC/11 BLSC/ 2 SC and 4 corners – Ch2]
Round 10
- Start with Colour B.
- Start with standing FLDC in the same stitch where you have closed R9. FLDC in next 4 ST, BLSC in next 5 ST, SC in 1st Ch of Ch2 SP, Ch2, SC into 2nd Ch of Ch2 SP, BLSC in next 5 ST, FLDC in next 4 ST.
- (FLDC in next 5 ST, BLSC in next 5 ST, SC in 1st Ch of Ch2 SP, Ch2, SC into 2nd Ch of Ch2 SP, BLSC in next 5 ST, FLDC in next 4 ST) – repeat on all sides.
- Invisible join into the top of 1st FLDC to close this round.
- Cut the yarn, leaving a tail long enough to hide it.
- [4 sides of 9 FLDC/10 BLSC/2 SC and 4 corners – Ch2]
Round 11
- Start with Colour A.
- Start with standing BLSC in the same stitch where you have closed R10, BLSC in next 4 ST, FLDC in next 5 ST, BLSC, SC in 1st Ch of Ch2 SP, Ch2, SC into 2nd Ch of Ch2 SP, BLSC, FLDC in next 2 ST, BLSC in next 7 ST.
- (BLSC in next 5 ST, FLDC in next 5 ST, BLSC, SC in 1st Ch of Ch2 SP, Ch2, SC into 2nd Ch of Ch2 SP, BLSC, FLDC in next 2 ST, BLSC in next 7 ST) – repeat on all sides.
- Invisible join into the top of 1st BLSC to close this round.
- Cut the yarn, leaving a tail long enough to hide it.
- [4 sides of 7 FLDC/14 BLSC/2 SC and 4 corners – Ch2]
Round 12
- Start with Colour B.
- Start with standing FLDC in the same stitch where you have closed R11. FLDC in next 4 ST, BLSC in next 7 ST, SC in 1st Ch of Ch2 SP, Ch2, SC into 2nd Ch of Ch2 SP, BLSC in next 4 ST, FLDC, BLSC in next 2 ST, FLDC in next 4 ST.
- (FLDC in next 5 ST, BLSC in next 7 ST, SC in 1st Ch of Ch2 SP, Ch2, SC into 2nd Ch of Ch2 SP, BLSC in next 4 ST, FLDC, BLSC in next 2 ST, FLDC in next 4 ST) – repeat on all sides.
- Invisible join into the top of 1st FLDC to close this round.
- Cut the yarn, leaving a tail long enough to hide it.
- [4 sides of 10 FLDC/13 BLSC/2 SC and 4 corners – Ch2]
Round 13
- Start with Colour A.
- Start with standing BLSC in the same stitch where you have closed R12, BLSC in next 4 ST, FLDC in next 7 ST, BLSC, SC in 1st Ch of Ch2 SP, Ch2, SC into 2nd Ch of Ch2 SP, BLSC, FLDC in next 4 ST, BLSC in next 7 ST.
- (BLSC in next 5 ST, FLDC in next 7 ST, BLSC, SC in 1st Ch of Ch2 SP, Ch2, SC into 2nd Ch of Ch2 SP, BLSC, FLDC in next 4 ST, BLSC in next 7 ST) – repeat on all sides.
- Invisible join into the top of the 1st BLSC to close this round.
- Cut the yarn, leaving a tail long enough to hide it.
- [4 sides of 11 FLDC/14 BLSC/2 SC and 4 corners – Ch2
Round 14
- Start with Colour B.
- Start with standing FLDC in the same stitch where you closed R13. FLDC in next 4 ST, BLSC in next 9 ST, SC in 1st Ch of Ch2 SP, Ch2, SC into 2nd Ch of Ch2 SP, BLSC in next 9 ST, FLDC in next 4 ST.
- (FLDC in next 5 ST, BLSC in next 9 ST, SC in 1st Ch of Ch2 SP, Ch2, SC into 2nd Ch of Ch2 SP, BLSC in next 9 ST, FLDC in next 4 ST) – repeat on all sides.
- Invisible join into the top of the 1st FLDC to close this round.
- Cut the yarn, leaving a tail long enough to hide it.
- [4 sides of 9 FLDC/18 BLSC/2 SC and 4 corners – Ch2]
Round 15
- Start with Colour A.
- Start with standing BLSC in the same stitch where you have closed R14, BLSC in next 4 ST, FLDC in next 9 ST, BLSC, SC in 1st Ch of Ch2 SP, Ch2, SC into 2nd Ch of Ch2 SP, BLSC, FLDC in next 9 ST, BLSC in next 4 ST.
- (BLSC in next 5 ST, FLDC in next 9 ST, BLSC, SC in 1st Ch of Ch2 SP, Ch2, SC into 2nd Ch of Ch2 SP, BLSC, FLDC in next 9 ST, BLSC in next 4 ST) -repeat on all sides.
- Invisible join into the top of 1st BLSC to close this round.
- Cut the yarn, leaving a tail long enough to hide it.
- [4 sides of 18 FLDC/11 BLSC/2 SC and 4 corners – Ch2]
Round 16
- Start with Colour B.
- Start with standing BLSC in the same stitch where you have closed R15. BLSC in next 15 ST, SC in 1st Ch of Ch2 SP, Ch2, SC into 2nd Ch of Ch2 SP, BLSC in next 15 ST.
- (BLSC in next 15 ST, SC in 1st Ch of Ch2 SP, Ch2, SC into 2nd Ch of Ch2 SP, BLSC in next 15 ST) – repeat on all sides.
- Invisible join into the top of 1st BLSC to close this round.
- Cut the yarn, leaving a tail long enough to hide it.
- [4 sides of 31 BLSC/2 SC and 4 corners – Ch2]
Round 17
- Start with Colour A.
- Start with standing BLSC in the same stitch where you have closed R16, FLDC in next 2 ST, BLSC, FLDC in next 12 ST, BLSC, SC in 1st Ch of Ch2 SP, Ch2, SC into 2nd Ch of Ch2 SP, BLSC, FLDC in next 12 ST, BLSC, FLDC in next 2 ST.
- (BLSC, FLDC in next 2 ST, BLSC, FLDC in next 12 ST, BLSC, SC in 1st Ch of Ch2 SP, Ch2, SC into 2nd Ch of Ch2 SP, BLSC, FLDC in next 12 ST, BLSC, FLDC in next 2 ST) – repeat on all sides.
- Invisible join into the top of 1st BLSC to close this round.
- Cut the yarn, leaving a tail long enough to hide it.
- [4 sides of 28 FLDC/5 BLSC/2 SC and 4 corners – Ch2
Round 18
- Start with Colour B.
- Start with standing FLDC in the same stitch where you have closed R17. BLSC in next 2 ST, FLDC, BLSC in next 14 ST, SC in 1st Ch of Ch2 SP, Ch2, SC into 2nd Ch of Ch2 SP, BLSC in next 14 ST, FLDC, BLSC in next 2 ST.
- (FLDC, BLSC in next 2 ST, FLDC, BLSC in next 14 ST, SC in 1st Ch of Ch2 SP, Ch2, SC into 2nd Ch of Ch2 SP, BLSC in next 14 ST, FLDC, BLSC in next 2 ST) – repeat on all sides.
- Invisible join into the top of the 1st BLSC to close this round.
- Cut the yarn, leaving a tail long enough to hide it.
- [4 sides of 3 FLDC/32 BLSC/2 SC and 4 corners – Ch2]
Round 19
- Start with Colour A.
- Start with standing BLSC in the same stitch where you have closed R18, FLDC in next 2 ST, BLSC, FLDC in next 14 ST, BLSC, SC in 1st Ch of Ch2 SP, Ch2, SC into 2nd Ch of Ch2 SP, BLSC, FLDC in next 14 ST, BLSC, FLDC in next 2 ST.
- (BLSC, FLDC in next 2 ST, BLSC, FLDC in next 14 ST, BLSC, SC in 1st Ch of Ch2 SP, Ch2, SC into 2nd Ch of Ch2 SP, BLSC, FLDC in next 14 ST, BLSC, FLDC in next 2 ST) – repeat on all sides.
- Invisible join into the top of 1st BLSC to close this round.
- Cut the yarn, leaving a tail long enough to hide it.
- [4 sides of 32 FLDC/5 BLSC/2 SC and 4 corners – Ch2]
Round 20
- Start with Colour B.
- Start with standing BLSC in the same stitch where you have closed R19. BLSC in next 19 ST, SC in 1st Ch of Ch2 SP, Ch2, SC into 2nd Ch of Ch2 SP, BLSC in next 19 ST.
- (BLSC in next 20 ST, SC in 1st Ch of Ch2 SP, Ch2, SC into 2nd Ch of Ch2 SP, BLSC in next 19 ST) – repeat on all sides.
- Invisible join into the top of 1st BLSC to close this round.
- Cut the yarn, leaving a tail long enough to hide it.
- [4 sides of 39 BLSC/2 SC and 4 corners – Ch2]
Round 21
- Start with Colour A.
- Start with standing FLDC in the same stitch where you have closed R20, FLDC in next 19 ST, BLSC, SC in 1st Ch of Ch2 SP, Ch2, SC into 2nd Ch of Ch2 SP, BLSC, FLDC in next 19 ST.
- (FLDC in next 20 ST, BLSC, SC in 1st Ch of Ch2 SP, Ch2, SC into 2nd Ch of Ch2 SP, BLSC, FLDC in next 19 ST) – repeat on all sides.
- Invisible join into the top of 1st FLDC to close this round.
- Cut the yarn, leaving a tail long enough to hide it.
- [4 sides of 39 FLDC/2 BLSC/2 SC and 4 corners – Ch2]
Round 22
- Start with Colour B.
- Start with standing BLSC in the same stitch where you have closed R21, BLSC in next 21 ST, SC in 1st Ch of Ch2 SP, Ch2, SC into 2nd Ch of Ch2 SP, BLSC in next 21 ST.
- (BLSC in next 22 ST, SC in 1st Ch of Ch2 SP, Ch2, SC into 2nd Ch of Ch2 SP, BLSC in next 19 ST) – repeat on all sides.
- Invisible join into the top of 1st BLSC to close this round.
- Cut the yarn, leaving a tail long enough to hide it.
- [4 sides of 41 BLSC/2 SC and 4 corners – Ch2]
Round 23
- Start with Colour A.
- Start with standing BLSC in the same stitch where you have closed R22, BLSC in next 22 ST, SC in 1st Ch of Ch2 SP, Ch2, SC into 2nd Ch of Ch2 SP, BLSC in next 22 ST.
- (BLSC in next 23 ST, SC in 1st Ch of Ch2 SP, Ch2, SC into 2nd Ch of Ch2 SP, BLSC in next 22 ST) – repeat on all sides.
- Invisible join into the top of 1st FLDC to close this round.
- Cut the yarn, leaving a tail long enough to hide it.
- [4 sides of 45 BLSC/2 SC and 4 corners – Ch2]
- Lay both squares on top of each other, so the RS is facing you. Attach Colour A with HDC through both BACK LOOPS in any ST. Crochet HDC using ONLY BACK LOOPS of both squares until you reach the corner. Make HDC in 1st Ch out of Ch2 SP, Ch3, HDC in 2nd Ch of Ch2 SP, continue with HDC in BACK LOOPS only. Repeat until you have 3 cm left till your starting point. Take the fibrefill and put it inside the connected squares. You can make this pin cushion tight or loose – it is your choice. Close the remain area, cut the yarn, hide yarn tails. You can place a button in the middle of the square if you wish.
- This is it, your crochet pin cushion is ready !
Conclusion
Congratulations on completing your crochet pin cushion! This handcrafted item is more than just a tool; it’s a testament to your skills and patience. This handcrafted accessory serves as an essential tool in your sewing kit, keeping pins and needles organized and easily accessible. Whether it finds a place in your own crafting space or is given as a heartfelt gift, the pin cushion carries with it the joy and effort of its creation. The experience of making a crochet pin cushion enriches your crafting journey, leaving you with not only a useful accessory but also a lasting symbol of your craftsmanship and creativity. Keep exploring new free patterns on our site to expand your crochet repertoire. Happy crocheting!