*Please note that some links on this page are affiliate links, it will cost you nothing, but if you will purchase something using these links, we may receive small commission.
Crocheting is an art form, a meditative practice, and a way of creating something beautiful and functional. Among the myriad patterns and designs, the granny square holds a special place in the heart of crafters. Its simple elegance and versatility have made it a timeless favorite. Whether you’re a seasoned crocheter or picking up the hook for the first time, this free granny square pattern is for you.
The Timeless Appeal of Granny Squares
Granny squares date back over a century, finding prominence in the early 1800s. They gained popularity due to their simplicity and the ability to use leftover yarn, making them a sustainable choice in an era of scarcity. Today, they are cherished for their nostalgic charm and the endless creative possibilities they offer. From vibrant blankets to chic bags, granny squares can transform into almost anything.
Granny squares, with their versatile and modular nature, can be the building blocks for an astonishing variety of projects. From traditional items to more innovative creations, the possibilities are nearly endless. Here’s a more detailed look at what you can create with these charming squares:
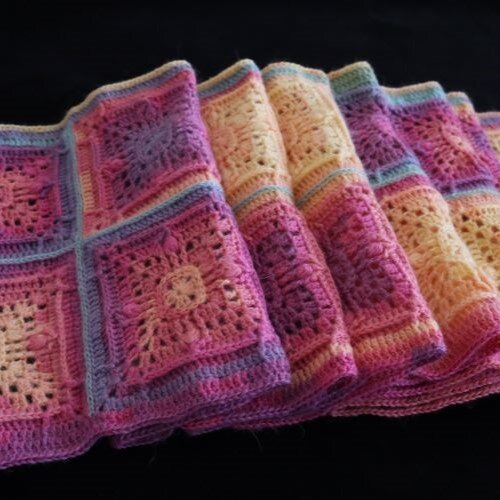
1. Blankets and Throws
- Classic Granny Square Blankets: Combine squares of various colors to create a traditional patchwork-style blanket.
- Continuous Granny Square Blankets: Instead of individual squares, this technique involves creating a blanket that keeps expanding from the center.
- Baby Blankets: Smaller granny squares in soft yarns make for cozy baby blankets.
2. Wearables
- Sweaters and Cardigans: Assemble granny squares to create stunning sweaters or cardigans with a vintage or bohemian flair.
- Scarves and Shawls: Join smaller granny squares to make scarves, or larger ones for shawls.
- Hats and Beanies: Worked in rounds, granny squares can even form the basis of stylish hats.
3. Home Decor
- Pillows and Cushions: Cover pillows with granny square cases for a splash of color and texture in your living space.
- Table Runners and Placemats: Granny squares can be made into charming table decor, suitable for various occasions.
- Wall Hangings: Create a tapestry-like wall hanging with a combination of colorful granny squares.
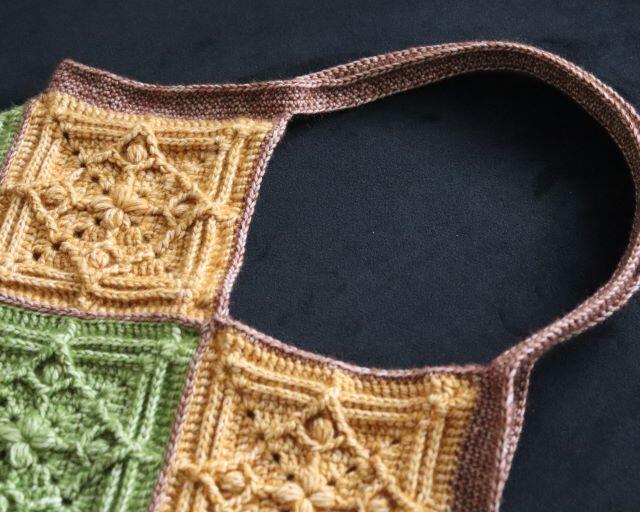
4. Accessories
- Bags and Purses: From small pouches to larger tote bags, granny squares stitched together can make fashionable and sturdy accessories.
- Coasters and Pot Holders: Functional yet decorative, these can be great small projects or gifts.
5. Toys and Amigurumi
- Stuffed Animals: Create a patchwork effect on amigurumi (crocheted stuffed toys) with granny squares.
- Play Mats and Rugs: Assemble a soft, durable play mat or a rug for kids’ rooms.
6. Seasonal Decorations
- Christmas Ornaments: Mini granny squares can be turned into festive holiday decorations.
- Garlands and Bunting: String together small granny squares to create colorful garlands for parties or room decoration.
7. Fashion Details
- Patchwork Skirts: Combine granny squares with fabric to create unique, bohemian-style skirts.
- Sleeves or Accents on Clothing: Attach granny squares onto jackets or jeans for a unique, customized look.
8. Upcycling and Repair
- Patching Up Old Clothes or Blankets: Use granny squares to patch holes or add new life to worn textiles.
Yarn Selection for this free Granny Square Pattern
The beauty of granny squares lies in their simplicity and adaptability. By changing colors, yarn types, and joining methods, you can tailor each project to suit your personal style or the intended use. Whether you’re making a heartfelt gift, a personal accessory, or adding a touch of handmade charm to your home, granny squares are a delightful choice. Let’s delve deeper into yarn selection for your free granny square pattern project. The yarn you choose can dramatically affect the look, feel, and functionality of your finished granny squares, so it’s important to consider a few key factors.
1. Fiber Content
- Acrylic Yarn: Affordable and widely available, acrylic yarn is durable, easy to wash, and holds color well. It’s a great choice for items like blankets and home decor.
- Cotton Yarn: Ideal for projects that require a bit more structure or for warmer climates, cotton yarn is soft, breathable, and maintains its shape well. Check out those yarns:
- Wool Yarn: Wool is excellent for warm and cozy projects. It’s naturally elastic, making it great for wearables. However, wool requires more careful washing.
- Blended Yarns: Blends of natural and synthetic fibers offer the best of both worlds, combining durability with the pleasant texture of natural fibers.
2. Yarn Weight
- Lighter Yarns (DK, Sport, Fingering): These are great for delicate or detailed work, suitable for baby blankets or lightweight throws.
- Medium Yarns (Worsted, Aran): The most common choice for granny squares, they offer a good balance of thickness and ease of handling.
- Bulky Yarns: For a quick project or a chunkier look, bulky yarns are ideal. They create a more textured and cozy feel but can be harder to manage for beginners.
3. Color and Dye
- Solid Colors: Ideal for a classic, uniform look. You can create patterns or geometric designs with carefully planned color placement.
- Variegated Yarns: These yarns offer a multi-colored pattern without changing yarns. They can add a whimsical, playful element to your project.
- Ombre or Gradient Yarns: For a subtle, sophisticated look, these yarns gradually change color along the length, creating a beautiful, seamless transition in colors.
4. Texture
- Smooth Yarns: Easier to work with, especially for beginners. They create even, neat stitches.
- Textured Yarns: Bouclé, tweed, or fuzzy yarns add an interesting dimension but can be challenging to crochet with as the stitches may not be as visible.
5. Care Instructions
- Washability: If you’re making a household item that requires frequent washing, like a baby blanket or kitchen item, look for machine-washable yarns.
- Special Care: Wool and some natural fibers might require hand washing and air drying. Consider this if you’re making a gift.
Materials Needed for this Granny Square Crochet Pattern
To start , you’ll need a few basic supplies:
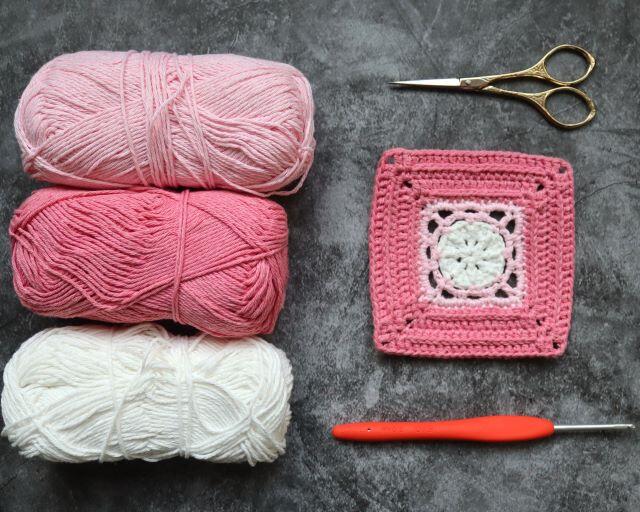
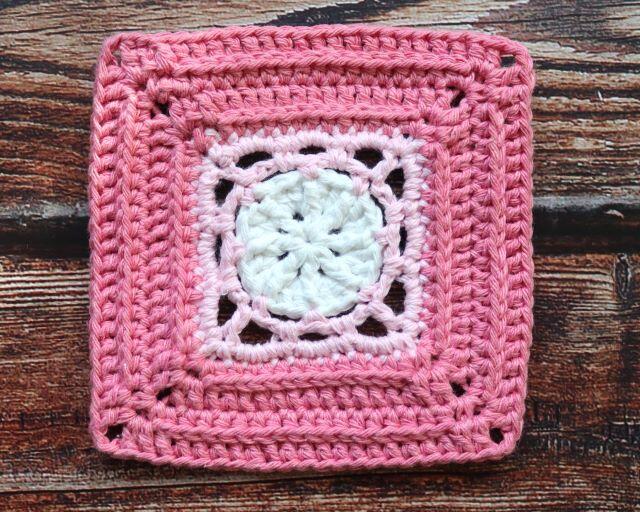
Pink version of this free granny square pattern:
- Crochet hook 3mm
- Drops You 9, Recycle Cotton (50g=125m):
- White (101) – Rounds 1, 2
- Light Pink (14) – Rounds 3, 4, 5
- Dark Pink (109) – Rounds 6, 7, 8, 9
- Scissors
- Embroidery needle
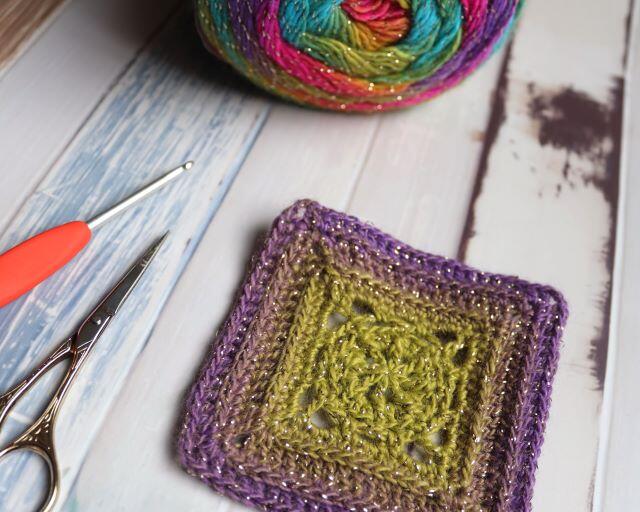
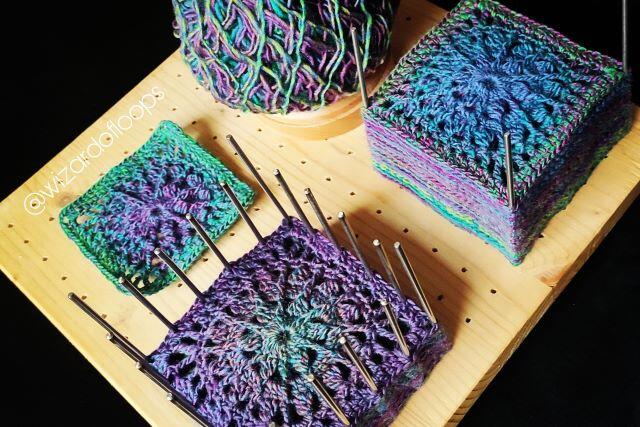
Green/violet version:
- Crochet hook 3mm
- Hobbii Universe (14), 100g=462m, 98% Acrylic/2% Polyester
- Scissors
- Embroidery needle
Gauge
Finished square before blocking 9cm wide
Abbreviations (US Terms)
- MR – magic ring
- Unf. – unfinished
- Ch = chain
- SP = space
- SLST = slip stitch
- ST = stitch
- HDC = half double crochet
- SC = single crochet
- DC = double crochet
- FPSC = front post single crochet
Crochet Granny Square Pattern
21 ST per side + Ch2 on corners
Round 1
Make MR. Ch2 (counts as DC), Ch1.
(DC, Ch1) – repeat till you’ll have 8 arches total.
Join with SLST into 2nd Ch of initial ST.
Round 2
Ch1 and make FPSC ar. init. ST + Ch2 = 1st FPDC, 2 DC in Ch1 SP.
(FPDC ar. DC, 2 DC in Ch1 SP) – repeat till the end.
Join with SLST into 2nd Ch of init. ST.
Round 3
Ch1 + SC in the same ST, Ch3.
(SC in FPDC, Ch3) – repeat till the end.
Join with SLST into 1st SC.
Round 4
Ch2 (counts as DC), Ch3, SC in Ch3 SP, Ch3, SC in next Ch3 SP, Ch3.
(DC in next SC, Ch3, SC in Ch3 SP, Ch3, SC in next Ch3 SP, Ch3) – repeat till the end.
Join with SLST into 2nd Ch of init. ST.
Round 5
Ch1 and make SC + Ch2 + SC into init. ST.
(3 SC in Ch3 SP, SC in SC, 3 SC in Ch3 SP, SC in SC, 3 SC in Ch3 SP, SC + Ch2 + SC in next DC of R4) – repeat till the end.
Join with SLST into 1st SC.
Round 6
SLST to Ch2 SP, Ch1 + SC + Ch2 + SC in the same Ch2 SP – your first corner.
(Make HDC in every ST till next corner = 13 HDC, SC + Ch2 + SC in the corner (Ch2 SP) – repeat till you reach your 1st corner and join with SLST into 1st SC.
Round 7
SLST to corner, Ch2 (counts as DC) + Ch2 + DC in the same corner.
(DC into SC of R6, DC in 3rd loop only of every HDC = 13 ST, DC in last ST, DC + Ch2 + DC in the corner) – repeat till you reach your 1st corner and join with SLST into init. ST.
Round 8
SLST to Ch2 SP, Ch1 + SC + Ch2 + SC in the same Ch2 SP – your first corner.
(Make HDC in every ST till next corner = 17 HDC, SC + Ch2 + SC in the corner (Ch2 SP) – repeat till you reach your 1st corner and join with SLST into 1st SC.
Round 9
SLST to corner, Ch2 (counts as DC) + Ch2 + DC in the same corner.
(DC into 1st ST, DC into 3rd loop only of every HDC = 17 ST, DC in last ST, DC + Ch2 + DC in the corner) – repeat till you reach your 1st corner and join with SLST into init. ST.
Cut the yarn. Close with invisible stitch. Hide the yarn tail.
All done!
Granny Square Blocking
Blocking is an essential step in finishing crochet projects, especially when working with granny squares. It involves shaping and setting your crocheted pieces to their proper dimensions and alignment. This process not only enhances the appearance of your work but also ensures that all the squares are uniform in size, making them easier to join together. Here’s a more in-depth look at granny square blocking:
Why Block Granny Squares?
- Uniformity: Blocking ensures all your squares are the same size, crucial for assembling them into larger projects.
- Shaping: It helps squares lay flat and defines their shape, making the stitches look neater and more consistent.
- Easing Assembly: When all pieces are uniform and flat, they are much easier to sew or crochet together.
Materials Needed for Blocking
- Blocking Board: A foam board or any flat, padded surface. Some crafters use specially designed blocking mats with grid lines for precise measurements.
- Rust-Proof Pins: Used to pin the squares in place while they dry.
- Spray Bottle or Basin for Wetting: Depending on the method of blocking chosen, a spray bottle for misting or a basin for soaking the squares.
- Measuring Tape or Ruler: To ensure all squares are blocked to the same size.
Methods of Blocking granny square
- Wet Blocking
- Soak the squares in lukewarm water for a few minutes.
- Gently squeeze out excess water (avoid wringing).
- Pin each square to the blocking board, stretching it to the desired size.
- Let them dry completely before removing the pins.
- Steam Blocking
- Pin the dry squares to the blocking board.
- Hold a steam iron a few inches above the work, letting the steam penetrate the fibers.
- Allow to dry without removing the pins.
- Spray Blocking
- Pin the squares to the blocking board while dry.
- Use a spray bottle to mist them with water.
- Allow to dry completely before removing the pins.
Tips for Effective Blocking
- Consistency: Ensure all squares are blocked to the same size for a uniform final product.
- Gentle Handling: Be gentle when handling wet yarn to avoid stretching or distorting the fibers.
- Natural Fibers: Wool and other natural fibers block very well and retain their shape after blocking. Synthetic fibers might not respond as well and may require steam blocking.
- Testing: If unsure about how the yarn will react, test block one square first.
- Spacing: When pinning, ensure the edges are straight and corners are right angles to achieve a perfect square shape.
Blocking is not just a final touch; it’s an integral part of the crocheting process, especially for projects involving multiple pieces like granny squares. It enhances the overall look and feel of your project, ensuring that your hard work results in a beautiful, professional-looking piece. Whether you’re creating a blanket, a garment, or decorative items, taking the time to block your granny squares can make a significant difference in the final outcome.
We hope you enjoyed following this free granny square pattern. Find more information on what you need to create a granny square: What do you need to crochet a perfect granny square?